Saturday, May 15, 2010

Chemistry Standard 7b

Chemistry Standard 7b: Students know chemical processes can either release(exothermic) or absorb (endothermic) thermal energy

The term exothermic describes a process or reaction that releases energy usually in the form of heat, but also in the form of light(flame, explosion, spark), electricity(battery), or sound. Chemical exothermic reaction are generally more spontaneous than endothermic reaction. In a thermochemical reaction that is exothermic, the heat is placed on the products of the reaction.

The opposite process is endothermic process which absorbs energy in the form of heat. Chemical endothermic reaction need heat to be performed. In a thermochemical reaction that is endothermic, the heat is placed on the reactant side.

Some examples of exothermic processes:
  • freezing water
  • condensing water vapor
  • combustuin of fuels such as woods, coal and oil
  • mixing alkalis and acids

Some examples of endothermic processes:

  • melting ice cube
  • evaporating liquid water
  • converting frost to water vapor(melting, boiling and evaporation in general are endothermic processes )

exothermic reaction video

endothermic reaction video

making play-dough


Materials:

  • 1 cup of flour

  • 1 cup of water

  • 1/2 cups of salt

  • 1 table spoon of oil

  • food color

Procedures:

  1. Put flour, water, salt, and oil in the pan and mix them together.

  2. On low temperature, put food color and stir them together

  3. when the mixture becomes solid, turn off the burner so it can be cool enough to touch

Tips:

  • sit the mixture on low temperature

  • don't go to burner too close

  • watch your hand when you stir the mixture
Science:

In play dough compound, surfactant combines with lubricant to reduce stickiness
photocredit: Theresa Anselmo


Saturday, May 8, 2010

Bending Glass

I bent and twisted the glass today.

Tips:

  • Don't bent the glass back and forth. It will make glass break.
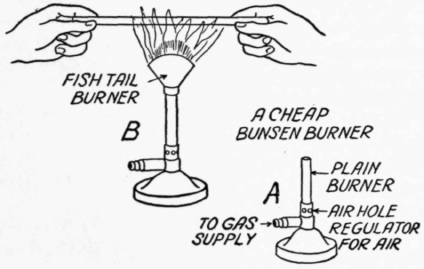
  • place the glass closely on the burner. It might take time if you place it too high.
  • wear goggles and gloves for your safety
  • Use two holders when ypu bend the glass

Science:

Glass is a visco-elastic material whose mechanical properties change very rapidly over a small temperature. so even though there isn't very high temperature. glass easily bends.

Photocredit: Kayla Jonansen

toothpick in the balloon

I stuck the toothpick in the balloon

Tricks:
  • the smaller balloon you have, it's easier than bigger ones
  • Use sharp toothpick so that can go into the balloon easily
  • put vaseline on top of the balloon so it can make it smooth
  • Stuck the toothpick on the very top of the balloon where has thickest rubber
Science:

Because of balloon's flexibility, balloon easiliy pops. But if you try on the top, rubber can easily move. so if there is more rubber, it's easier to stuck the sharp objects.

photocredit: Theresa Anselmo

Thursday, May 6, 2010

Friday, April 23, 2010

cutting and bending glass and putting toothpick in balloon

This week we did two experitmentsl, bending glass and putting toothpick in ballon.
We wore goggles for our safety and cut the glass before we burn the glass.
We used nail file to cut the glass. After we made damage in the glass, we broke the glass whcih faced downward. Then we put glass above the fire and made glass melt and bend slowly. We had to be careful because it might burn your fingers. It was interesting experiment.

We blew the balloon and tied the top. And then we picked the sharp toothpick and put vaseline on the balloon and toothpick. We were scared to put the toothpick in the top of the balloon so we asked someone else to do it for us but he also failed. I regreted after him by not trying. I could success instead of him. Anyways, I knew tht balloon could hold sharp thing on the top of the balloon.

Wednesday, April 21, 2010

IProposeWe


Materials:
  • 1/2 cup of milk


  • 1/2 cup of whipping cream


  • 1/4 cup of sugar


  • 1/4 teaspoon of vanilla or vanilla flavoring


  • 1/2 to 3/4 cup of sodium chloride as table salt or rock salt


  • 2 cups of ice


  • 1-quart ziploc bag


  • 1-gallon ziploc bag
Procedures:
  1. Add 1/4 cup of sugar, 1/2 cup of milk, 1/2 cup of whipping cream and 1/4 teaspoon vanilla to the quart-ziploc bag. Seal the bag securely.
  2. Put 2 cups of ice into the gallon-ziploc bag.
  3. Use a thermometer to measure and record the temperature of the ice in the gallon bag.

  4. Add 1/2 to 3/4 cup of salt to the bag of ice

  5. Place the sealed quart-bag inside the gallon bag of ice and salt. Seal the gallon bag securely.

  6. Gently rock the gallon bag from side to side.

  7. Continue to rock the bag for 10-15 minutes or until the contents of the quart bag have solidified into ice cream

  8. Open the gallon bag and use the thermometer to measure and record the temperature of the ice/salt mixture.

  9. Remove the quart bag and enjoy your ice cream.
Safety Precautions:
Wear gloves when you rock the gallon bag. It might damage your hand
Scientific Principles:

Ice absorbs the energy in order to melt. the energy is absorbed from the ingredients and from the outside environment. When you put salt into the ice, it lowers the freezing point of the ice so more energy can be absorbed. Ice gets colder and this is how your ice cream freezes.